Safelisting with persisted queries
Secure your graph while minimizing request latency
This feature is only available with a GraphOS Enterprise plan.
You can test it out by signing up for a free Enterprise trial.
GraphQL APIs are broadly open by design to provide flexibility and efficiency in client development. However, this openness also introduces the risk of potentially malicious requests and the subsequent need to secure your graph.
With GraphOS Enterprise, you can enhance your supergraph's security by maintaining a persisted query list (PQL) for your supergraph's self-hosted router. To create and update the PQL, first-party apps register trusted operations to the PQL at build time.
ⓘ NOTE
Clients can register any kind of operation to a PQL, including queries, mutations, and subscriptions.
At runtime, the Apollo Router checks incoming requests against the PQL, which can act as operation safelist, depending on your router configuration.
Your router can use its persisted query list (PQL) to both protect your supergraph and speed up your clients' operations:
When you enable safelisting, your router rejects any incoming operations not registered in its PQL.
Client apps can execute an operation by providing its PQL-specified ID instead of the entire operation string.
- Requesting by ID can significantly reduce latency and bandwidth usage for large operation strings.
- Your router can require that clients provide operations by ID and reject full operation strings—even operation strings present in the PQL.
Differences from automatic persisted queries
The Apollo Router also supports a related feature called automatic persisted queries (APQ). With APQ, clients can execute a GraphQL operation by sending the SHA256 hash of its operation string instead of the full string.
APQ has a few limitations compared to registered persisted queries.
| Automatic persisted queries | Registered persisted queries | |
|---|---|---|
| Operation performance | ✅ Clients can send identifiers instead of full operation strings, reducing request sizes and latency dramatically. | 🌟 Registered persisted queries share the same performance enhancement mechanism as APQs. Additionally, they benefit from query plan cache warm-ups, which are active by default from version1.31.0 of the router. |
| Build- vs. runtime registration | Operations are registered at runtime. One of your router instances must receive any given operation string from a client at least once to cache it. | Clients contribute to the PQL at build-time. Your router fetches its PQL from GraphOS on startup and polls for updates, meaning clients can always execute operations using their PQL-specified ID. |
| Safelisting | ❌ APQ doesn't provide safelisting capabilities because the router dynamically populates its APQ cache over time with any operations it receives. | ✅ Clients preregister their operations to GraphOS. Your router fetches its PQL on startup, enabling it to reject operations not present in the PQL. |
If you only want to improve request latency and bandwidth usage, APQ addresses your use case. If you also want to secure your supergraph with operation safelisting, you should register operations in a PQL.
Security levels
The Apollo Router supports the following security levels, in increasing order of restrictiveness:
| Security Level | Description |
|---|---|
| Allow operation IDs | Clients can optionally execute an operation on your router by providing the operation's PQL-specified ID. |
| Audit mode | Executing operations by providing a PQL-specified ID is still optional, but the router logs any unregistered operations. |
| Safelisting | The router rejects any incoming operations that aren't in its PQL. Clients can use either PQL-specified IDs or operation strings to execute operations. |
| Safelisting with IDs only | Clients can only execute operations by providing their PQL-specified IDs; the router rejects all freeform GraphQL requests. |
💡 TIP
You can find more details, including configuration instructions, in the implementation section.
These levels allow you to incrementally adopt persisted queries on a client-by-client basis. Specifically, the router should use audit mode until you're confident that all your clients' trusted operations have been registered in the PQL. Refer to the incremental adoption section for a step-by-step guide.
Implementation steps
Persisted queries provide benefits to different teams:
- Safelisting helps platform teams secure the graph and optimize its performance.
- Application developers can use registered operation IDs to write performant client code.
Implementation also requires collaboration among these parties. These are the main steps for implementing persisted queries for safelisting, along with the team that usually performs them:
| Step | Description | Responsible party |
|---|---|---|
| 1. PQL creation and linking | Create and apply a PQL to graph variants. | Platform team |
| 2. Router configuration | Update your router's YAML config file to enable persisted queries at the appropriate security level. | Platform team |
| 3. Operation registration | Generate and publish a persisted queries manifest (PQM) to the PQL from your client's CI/CD pipeline. | App developers |
| 4. Client updates (Optional) | Update clients to use operation IDs rather than full operation strings. This step provides performance benefits but isn't necessary for safelisting. | App developers |
Continue reading for each step's details, or skip to the incremental adoption section for the recommended incremental adoption strategy. (This section assumes you have a high-level understanding of each implementation step.)
1. PQL creation and linking
To use persisted queries, you first need a persisted query list (PQL) in GraphOS Studio. Platform teams create an empty PQL in GraphOS Studio so that client teams can register operations to it.
Each PQL is associated or "linked" with a single graph in GraphOS. A graph, however, can have several PQLs. For example, one graph may need multiple PQLs if you want a separate PQL for each contract variant. You can link a PQL to any variants of its graph. And although many variants may use the same PQL, each variant can only have one linked PQL at a time.
1.1 PQL creation
- From your organization's Graphs page in GraphOS Studio, open the PQL page for a graph by clicking its PQL button:
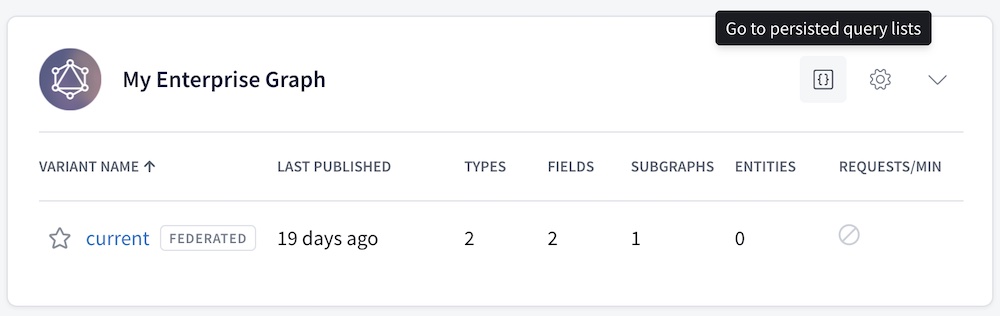
💡 TIP
You can also access a graph's PQLs from its settings page.
From the PQL page:
If you haven't created any PQLs yet, click Create a Persisted Query List.
If you already have at least one PQL, click New List in the upper right.
The following dialog appears:
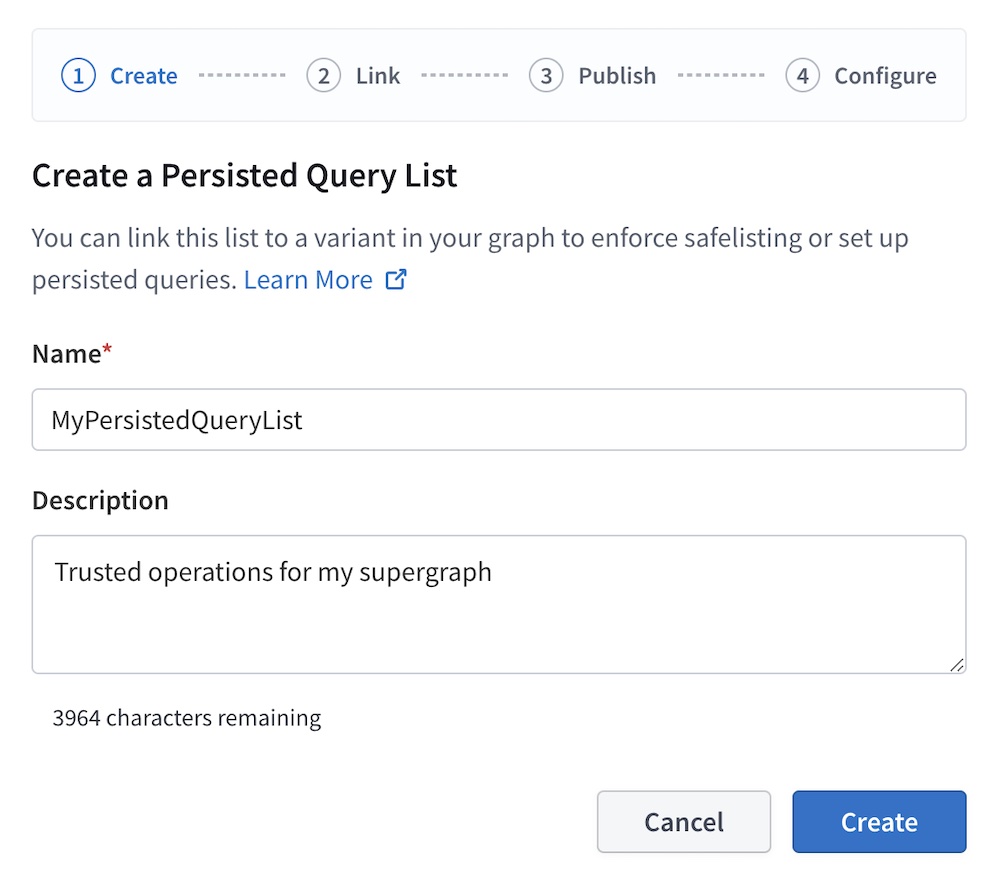
Provide a name and (optional) description for your PQL, then click Create.
- At this point, your empty PQL has been created. The remaining dialog steps help with additional setup.
The second dialog step (Link) enables you to link your new PQL to one existing variant of your graph.
- You can optionally Skip this step and link variants later (covered in the next step).
The third dialog step (Publish) displays your new PQL's unique ID and an example Rover CLI command for publishing operations to the PQL.
- For now, you can leave the PQL empty. Client teams can publish operations to it in a later step.
- Save this Rover CLI command so you can pass it on to your client teams when they publish operations.
The fourth and final dialog step (Configure) displays the configuration options you apply to your router to begin using your PQL. We'll cover these in a later step.
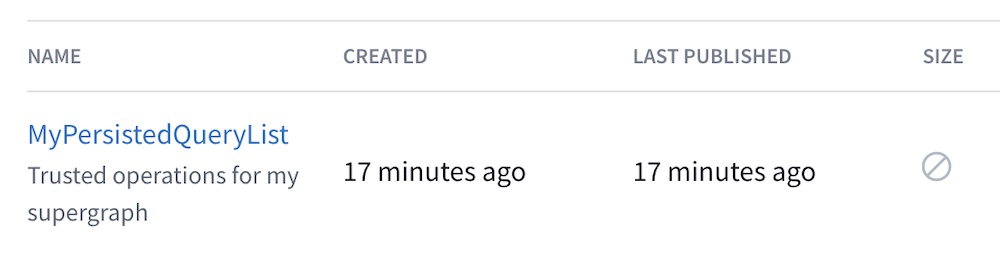
Click Finish to close the dialog. Your newly created PQL appears in the table:
1.2 Link the PQL to variants
After you create a PQL, you can link it to one or more variants of your graph. Each router instance associated with a linked variant automatically fetches its PQL from GraphOS.
💡 TIP
It's safe to link an empty or incomplete PQL to a variant because your router doesn't use its PQL for anything until you configure it to do so (covered in a later step).
From the table on your graph's PQL page, open the ••• menu under the Actions column for the PQL you want to link:

Click Link and Unlink Variants. The following dialog appears:
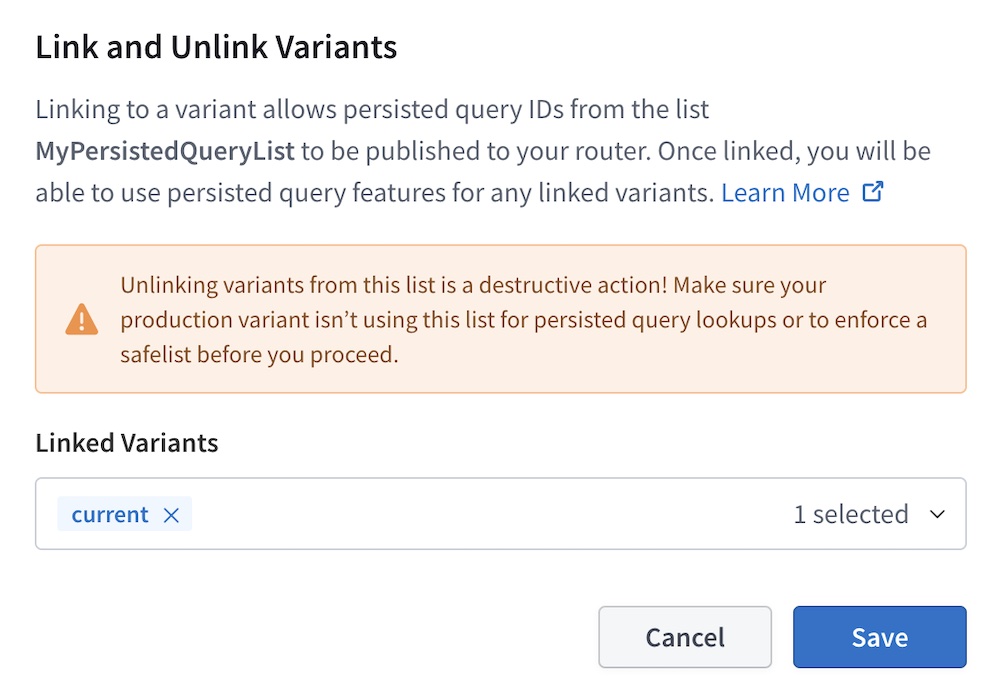
Use the dropdown menu to select any variants you want to link your PQL to.
💡 TIP
As a best practice, you can begin by linking your PQLs to a staging environment before moving on to a production one.
- Click Save.
After you link a PQL to a variant, GraphOS makes the PQL available in Uplink, the service that delivers configurations to your router at runtime. Once configured, the router polls Uplink to ensure it uses the most up-to-date PQL for linked variants.
2. Router configuration
The Apollo Router is the key component that enforces safelisting.
As soon as a graph variant has a linked PQL, you can configure router instances to fetch and use the PQL by following these steps:
Ensure your router instances are ready to work with PQLs:
- Make sure you're using version
1.32.0or later of the Apollo Router. (The feature was released in preview in version1.25.0and made generally available in1.32.0.) - Make sure your router instances are connected to your GraphOS Enterprise organization and that they're associated with a variant that your PQL is linked to.
- Make sure you're using version
Set your desired security level in your router's YAML config file. For supported options, see router security levels. When first implementing persisted queries, it's best to start with audit—or "dry run"—mode.
Deploy your updated router instances to begin using your PQL.
Once your organization's PQL has registered all your clients' operations and you've ensured your client apps are only sending registered operations, you can update your router configuration to the safelisting security level.
Router security levels
The Apollo Router supports the following security levels, in increasing order of restrictiveness:
- Allow operation IDs: Clients can optionally execute an operation by providing the operation's PQL-specified ID.
- All other levels also provide this core capability.
- This level doesn't provide safelisting.
- Audit mode: Executing operations by providing a PQL-specified ID is still optional, but the router also logs any unregistered operations.
- The level serves as a dry run and helps you identify operations you may still need to register before turning on safelisting.
- Safelisting: The router rejects any incoming operations not present in its PQL. Requests can use either ID or operation string.
- Before moving to this security level, ensure all your client operations are present in your PQL.
- Safelisting with IDs only: The router rejects any freeform GraphQL operations. Clients can only execute operations by providing their PQL-specified IDs.
- Before moving to this security level, ensure all your clients execute operations by providing their PQL-specified ID.
When adopting persisted queries, you should start with a less restrictive security such as audit mode. You can then enable increasingly restrictive levels after your teams have updated all clients.
See below for sample YAML configurations for each level. Refer to the router configuration options for option details.
ⓘ NOTE
From version 1.25.0 to 1.32.0, the persisted_queries configuration option was named preview_persisted_queries. Upgrade your router to version 1.32.0 or later to use the generally available version of the feature and the example configuration snippets below.
Allow operation IDs
To use persisted queries only to reduce network bandwidth and latency (not for safelisting), add the following minimal configuration:
persisted_queries:enabled: true
ⓘ NOTE
You can use this security level with or without automatic persisted queries enabled.
This mode lets clients execute operations by providing their PQL-specified ID instead of the full operation string. Your router also continues to accept full operation strings, even for operations that don't appear in its PQL.
Audit mode (dry run)
Turning on logging is crucial for gauging your client apps' readiness for safelisting. The logs identify which operations you need to either add to your PQL or stop your client apps from making.
To enable logging for unregistered queries, enable the log_unknown property:
persisted_queries:enabled: truelog_unknown: true
ⓘ NOTE
You can use audit mode with or without automatic persisted queries enabled.
Unregistered operations appear in your router's logs.
For example:
2023-08-02T11:51:59.833534Z WARN [trace_id=5006cef73e985810eb086e5900945807] unknown operation operation_body="query ExampleQuery {\n me {\n id\n }\n}\n"
If your router receives an operation registered in the PQL, no log message will be output.
You can use these router logs to audit operations sent to your router and ask client teams to add new ones to your PQL if necessary.
Safelisting
⚠️ CAUTION
Before applying this configuration, ensure your PQL contains all GraphQL operations that all active versions of your clients execute. If you enable safelisting without ensuring this, your router will reject any unpublished client operations.
With the following configuration, your router allows only GraphQL operations that are present in its PQL while rejecting all other operations:
persisted_queries:enabled: truelog_unknown: truesafelist:enabled: truerequire_id: falseapq:enabled: false # APQ must be turned off
ⓘ NOTE
To enable safelisting, you must turn off automatic persisted queries (APQs). APQs let clients register arbitrary operations at runtime while safelisting restricts operations to those that have been explicitly registered.
To execute an operation, clients can provide its PQL-specified ID or full operation string.
The router rejects unregistered operations, and if log_unknown is true, those operations appear in your router's logs.
💡 TIP
It's best to keep log_unknown as true while adopting safelisting so you can monitor the operations your router rejects. Once you're confident that all your clients are properly configured, you can turn it off to reduce noise in your logs.
Safelisting with IDs only
⚠️ CAUTION
Do not start with this configuration. It requires all your clients to execute operations by providing their PQL-specified ID. If any clients still provide full operation strings, the router rejects those operations, even if they're included in the safelist.
With the following configuration, your router rejects all operation strings and only accepts registered operation IDs:
persisted_queries:enabled: truelog_unknown: truesafelist:enabled: truerequire_id: trueapq:enabled: false # APQ must be turned off
ⓘ NOTE
To enable safelisting, you must turn off automatic persisted queries (APQs). APQs let clients register arbitrary operations at runtime while safelisting restricts operations to those that have been explicitly registered.
If you want to use this security level, you should always first set up safelisting with operation strings allowed. ID-only safelisting requires all your clients to execute operations via PQL-specified ID instead of an operation string. While making those necessary changes, you can use the less restrictive safelisting mode in your router.
With log_unknown set to true, the router logs all rejected operations, including those registered to your PQL but that used the full operation string rather than the PQL-specified ID.
ⓘ NOTE
It's best to keep log_unknown as true while adopting safelisting so you can monitor the operations your router rejects. Once you're confident that all your clients are properly configured, you can turn it off to reduce noise in your logs.
3. Operation registration
Registering operations to a PQL has two steps:
- Generating persisted query manifests (PQM) using client-specific tooling
- Publishing PQMs to the PQL using the Rover CLI tool
Building both of these into your CI/CD pipeline incorporates new operations automatically whenever you release a new client app version.
3.1 Generate persisted query manifests
Once a PQL exists in GraphOS, client teams can start publishing operations to it. To do so, you must generate JSON manifests of the operations to publish. You generate a separate manifest for each of your client apps.
You perform manifest generation in your CI/CD pipeline. Doing so automatically incorporates new operations when you release a new client app version.
Generation methods
Apollo Client for Web, Kotlin, and iOS each provide a mechanism for generating a manifest file from your app source. Apollo also supports manifests generated by the Relay compiler.
ⓘ NOTE
If your client app uses another GraphQL client library, you can build your own mechanism for generating operation manifests. See the expected manifest format.
See the instructions for your client library:
Apollo Client Web
In your app's project, install the
@apollo/generate-persisted-query-manifestpackage as a development dependency:npm install --save-dev @apollo/generate-persisted-query-manifestThis package includes a CLI command to generate a manifest file from your application source.
Generate your first manifest with the following command:
npx generate-persisted-query-manifest- If the command succeeds, your manifest is written to
persisted-query-manifest.json. - If the command fails (or if your manifest doesn't include all the operations you expect it to), you can configure the command's behavior using the options described in the package README.
- If the command succeeds, your manifest is written to
See the full Apollo Client persisted queries guide for detailed instructions.
Apollo Kotlin
ⓘ NOTE
Manifest generation requires Apollo Kotlin 3.8.2 or later.
To generate an operation manifest with Apollo Kotlin, you modify your project's Gradle plugin configuration to generate a manifest in addition to the standard Kotlin source for your operations:
apollo {service("myapi") {packageName.set("com.example.myapi")operationManifestFormat.set("persistedQueryManifest")}}
The manifest will be generated in build/generated/manifest/apollo/myapi/persistedQueryManifest.json
See the full Apollo Kotlin persisted queries guide for detailed instructions.
Apollo iOS
ⓘ NOTE
Manifest generation requires Apollo iOS 1.4.0 or later.
To generate an operation manifest with Apollo iOS, you use the same code generation engine that you use to generate Swift code for each of your operations. Specifically, you modify the engine's file output configuration to include the output of an operationManifest.
See the full Apollo iOS persisted queries guide for detailed instructions.
Relay compiler
The Rover CLI has a built-in capability to publish operation manifests generated by the Relay compiler. Refer to Relay's documentation for instructions on generating manifests.
3.2 Publish manifests to the PQL
💡 TIP
Ensure your Rover CLI version is 0.17.2 or later. Previous versions of Rover don't support publishing operations to a PQL.
Download the latest version.
After you generate an operation manifest, you publish it to your PQL with the Rover CLI like so:
rover persisted-queries publish my-graph@my-variant \--manifest ./persisted-query-manifest.json
- The
my-graph@my-variantargument is thegraph refof any variant the PQL is linked to.- Graph refs have the format
graph-id@variant-name.
- Graph refs have the format
- Use the
--manifestoption to provide the path to the manifest you want to publish.
ⓘ NOTE
The persisted-queries publish command assumes manifests are in the format generated by Apollo client tools. The command can also support manifests generated by the Relay compiler by adding the --manifest-format relay argument. Your Rover CLI version must be 0.19.0 or later to use this argument.
The persisted-queries publish command does the following:
Publishes all operations in the provided manifest file to the PQL linked to the specified variant, or to the specified PQL.
- Publishing a manifest to a PQL is additive. Any existing entries in the PQL remain.
- If you publish an operation with the same
idbut different details from an existing entry in the PQL, the entire publish command fails with an error.
Updates any other variants that the PQL is applied to so that routers associated with those variants can fetch their updated PQL.
As with generating manifests, it's best to execute this command in your CI/CD pipeline to publish new operations as part of your app release process. The API key you supply to Rover must have the role of Graph Admin or Persisted Query Publisher. Persisted Query Publisher is a special role designed for use with the rover persisted-queries publish command; API keys with this role have no other access to your graph's data in GraphOS, and are appropriate for sharing with trusted third party client developers who should be allowed to publish operations to your graph's PQL but should not otherwise have access to your graph.
Test operations
You can send some test operations to test that you've successfully published your manifests:
First, start your GraphOS-connected router:
APOLLO_KEY="..." APOLLO_GRAPH_REF="..." ./router --config ./router.yaml2023-05-11T15:32:30.684460Z INFO Apollo Router v1.18.1 // (c) Apollo Graph, Inc. // Licensed as ELv2 (https://go.apollo.dev/elv2)2023-05-11T15:32:30.684480Z INFO Anonymous usage data is gathered to inform Apollo product development. See https://go.apollo.dev/o/privacy for details.2023-05-11T15:32:31.507085Z INFO Health check endpoint exposed at http://127.0.0.1:8088/health2023-05-11T15:32:31.507823Z INFO GraphQL endpoint exposed at http://127.0.0.1:4000/ 🚀
Next, make a POST request with curl, like so:
curl http://localhost:4000 -X POST --json \'{"extensions":{"persistedQuery":{"version":1,"sha256Hash":"dc67510fb4289672bea757e862d6b00e83db5d3cbbcfb15260601b6f29bb2b8f"}}}'
If your router's PQL includes an operation with an ID that matches the value of the provided sha256Hash property, it executes the corresponding operation and returns its result.
4. Client updates
With your manifest published and the router configured, you can update your clients to use registered operations IDs. Organizations can do this one client at a time as client teams publish client-specific PQMs to the PQL.
ⓘ NOTE
This step provides performance benefits but isn't necessary for safelisting. You can continue to use full operation strings rather than operation IDs in safelisting mode.
To execute operations using their PQL-specified ID instead of full operations strings, clients can use the same protocol used for automatic persisted queries (APQ).
Here's the JSON body of a request to execute an operation by its ID:
{"variables": null,"extensions": {"persistedQuery": {"version": 1,"sha256Hash": "PQL_ID_HERE"}}}
💡 TIP
If executing an operation that includes GraphQL variables, specify them with the variables property.
Apollo's mobile clients let you use the same mechanism for executing persisted queries operations as APQs. Refer to their persisted query documentation for implementation details.
With Apollo Client Web, sending persisted queries by ID requires you to use an additional package at runtime alongside @apollo/client's built-in createPersistedQueryLink. Apollo Client Web requires this package to ensure that the ID sent at runtime matches the ID generated by generate-persisted-query-manifest. Mobile clients have a more deterministic approach to formatting operations and, thus, don't need additional support.
Refer to the Apollo Client Web's persisted query documentation for implementation details.
Incremental adoption path
Persisted queries' tiered security levels let you adopt an incremental approach rather than simultaneously requiring all clients to send requests via registered operations IDs. You can follow these steps for incremental adoption:
Identify the first client you want to implement persisted queries with. It could be the client or team you're most comfortable with or the one most comfortable with GraphOS.
Follow all implementation steps for your chosen client:
- Create and link a PQL to a staging or development variant.
- When configuring the router, begin with audit mode.
- Use the client-specific tooling to generate an operation manifest and publish it to the PQL as part of your client's CI/CD pipeline.
- (Optional) Update your chosen client to use only registered operations, either by full operation string or operation ID.
- Teams working with Apollo Client Web need to use an additional package at runtime to send persisted queries.
Continue to monitor your router logs: once you consistently see that unregistered operations are being logged and registered ones aren't, you've completed the setup for this client! 🎉
If safelisting is your goal, you'll need to coordinate across client teams to complete these steps for each of your client apps.
Once your router's logs are completely clear of unexpected operations, you can configure your router to use safelisting mode. Then, to reap the performance benefits, update your client apps to use operation IDs rather than full operation strings.
Once you've confirmed all client apps use IDs, you can move to the most restrictive security level: safelisting with IDs only. This security level enforces the performance benefit of using operation IDs rather than full operation strings. If you're content with the safelisting aspect of persisted queries with only optional performance benefits, you don't need to enable it.
Coordinate with client teams
Once you've followed the implementation steps for one client, you can coordinate across all your client teams:
- Identify all the client apps that execute operations against your router, and the GraphQL client libraries that those apps use.
- Before you enable safelisting in your router, your client apps must start publishing their operations to your PQL.
- Communicate to your client development teams that adopting persisted queries will require adding tooling to their CI/CD pipeline.
- Specifically, each client team will need to generate client operation manifests and publish manifests to the PQL.
- Identify which team members will assist with adding tooling to their respective CI/CD pipelines.
Guide each client team to follow the implementation steps presented in the incremental adoption path.
Persisted query list management
From the Persisted Query Lists page, you can perform the following actions by clicking the ••• menu under the Actions column on the right of any PQL:
Download the list as a JSON file
Publish operations
Update the PQL's name and description
Link and unlink variants
Delete the PQL entirely
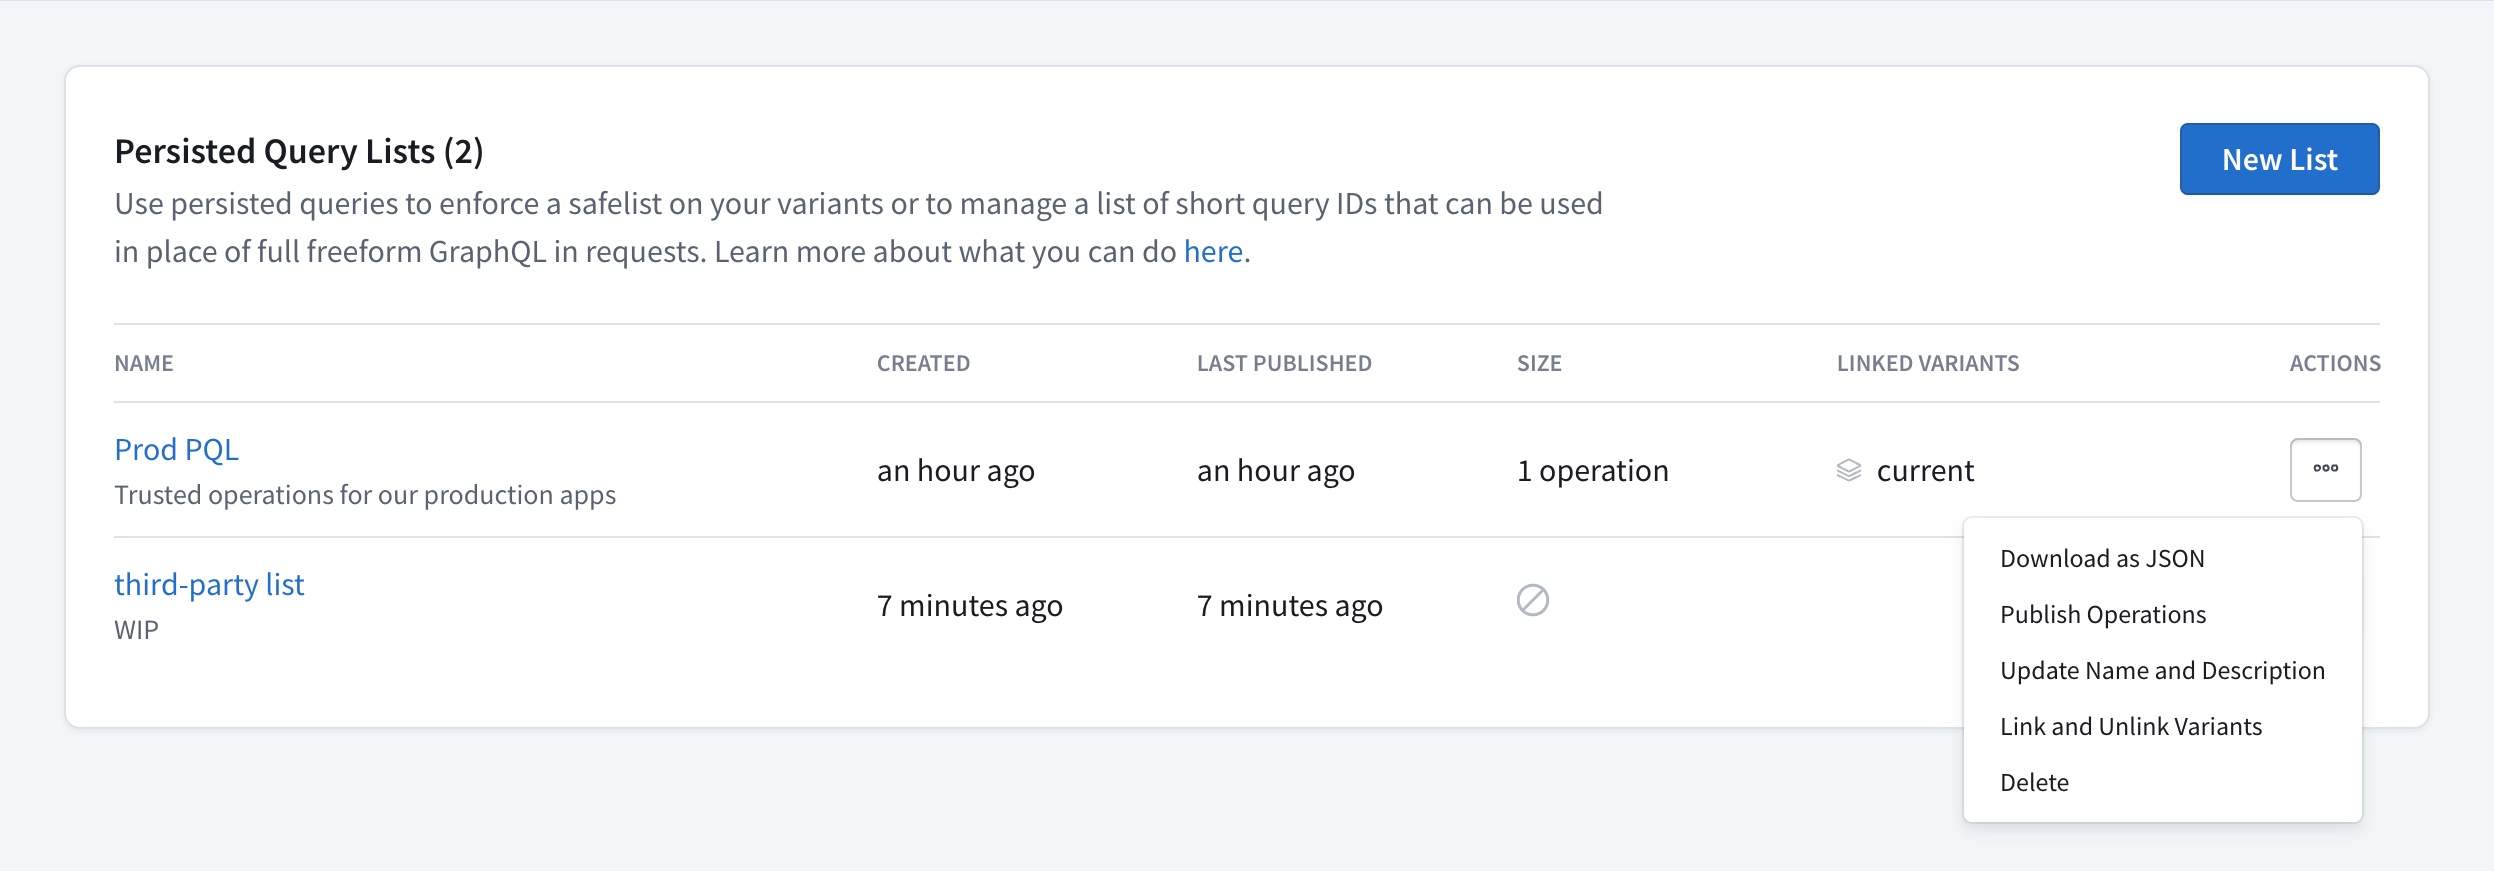
The Publish operations action provides the Rover CLI command to do so.
Operation management
You can add new operations to a PQL by using the Rover CLI, and you can delete operations from the PQL's page in GraphOS Studio. Since every operation should have a unique ID, you can't update existing operations—if you try to publish a revised operation body for an existing operation ID, Rover returns an error.
Adding operations
To add new operations to a PQL, you need to publish an updated manifest using the Rover CLI. If the manifest you're publishing doesn't include an operation in the PQL, this does not delete that operation from the PQL. Each manifest publication only adds any new operations to the PQL.
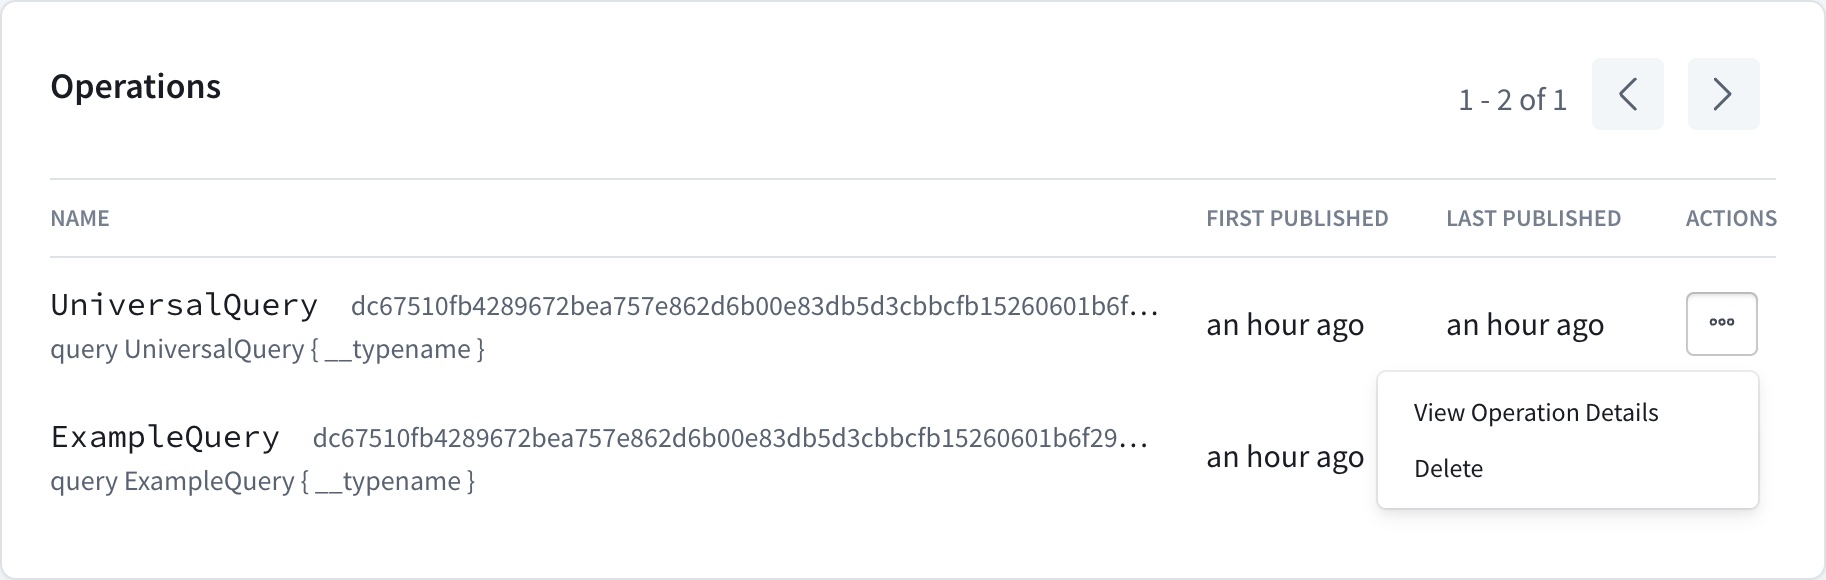
Deleting operations
If you want to delete an operation, you must do so from Studio. From the Persisted Query Lists page, click a persisted query list to open it. Then, click the ••• menu under the Actions column next to a particular operation and select Delete.
You should only delete operations that are problematic and shouldn't be executed. Even for such operations, it's important to recognize that operation deletions can cause application errors for legitimate clients, depending on your router's security level and if the client is sending full operation strings or operation IDs.
- Regardless of security level, if a client sends an operation ID of a deleted operation, the router rejects the operation.
- If you enabled safelisting, the router rejects any operations you deleted from the PQL but that your clients still perform, whether clients send operation IDs or full operation strings for the deleted operation.
- When the router allows operation IDs or is in audit mode, if a client sends the full operation string of a deleted operation, the router executes it.
Although you can't undo operation deletions directly via the Studio UI, you can always republish a deleted operation using the Rover CLI.
Manifest format
ⓘ NOTE
You only need to read this section if you're building your own tooling to generate persisted query manifests.
A persisted query manifest has the following minimal structure:
{"format": "apollo-persisted-query-manifest","version": 1,"operations": [{"id": "dc67510fb4289672bea757e862d6b00e83db5d3cbbcfb15260601b6f29bb2b8f","body": "query UniversalQuery { __typename }","name": "UniversalQuery","type": "query"}]}
Manifest properties are documented below.
Top-level properties
| Property | Description |
|---|---|
| This value is currently always |
| This value is currently always |
| An array of objects describing the individual GraphQL operations to publish. For details, see Per-operation properties. |
Per-operation properties
Each entry in a manifest's operations array is a JSON object that describes a single GraphQL operation to publish:
{"id": "dc67510fb4289672bea757e862d6b00e83db5d3cbbcfb15260601b6f29bb2b8f","body": "query UniversalQuery { __typename }","name": "UniversalQuery","type": "query"}
Each operation object has the following properties:
| Property | Description |
|---|---|
| The unique ID to use for the operation in your PQL. This value must be unique among operations in the PQL. It can match a previously published operation as long as the operation's To ensure uniqueness, tooling should generate this value based on the operation |
| The complete query document for the operation. Includes the definition of the operation itself, along with accompanying fragment definitions. The router executes this string as the query document when a client sends the corresponding ID or matching operation. For details, see Ensuring consistent operation documents. |
| The operation's name. Must match the name specified in This value does not need to be unique among operations in the PQL. Often, different clients execute slightly different operations with the same name, and those operations each require a separate entry in the PQL. |
| The type of GraphQL operation. Always one of the following values:
|
Generating IDs
When generating operation IDs for a manifest, you should use a value that's unique to each operation, such as the query document's cryptographic hash. Apollo's manifest generation tools use the base16 representation of the document's SHA256 hash, which is the same format used for APQ.
By generating identifiers based on query documents this way, you ensure that different operations always have different IDs. ID uniqueness prevents unexpected collisions in your PQL. It also allows the router to execute operations both by full operation strings and PQL-specified IDs.
⚠️ CAUTION
Never use an operation's name for its PQL ID. Different clients (or even different versions of the same client) might execute different operations with the same name, and all those distinct operations should be present in your PQL.
Ensuring consistent operation documents
Whenever a client sends an operation string to a router with safelisting enabled, the router checks for that operation string's presence in its persisted query list.
When comparing an incoming freeform GraphQL document to the registered operations in its PQL, the router ignores some aspects of the document that have no semantic impact:
- Ignored tokens such as white space, comments, and commas are ignored.
- The order of top-level definitions (operation and fragment definitions) is ignored. This means that when assembling a full GraphQL document from its operation and fragments, there's no need to ensure that fragments are put in the same order at build time and at run time.
However, all other details of the document must match. For example, field order, argument order, $variable names, alias names, string and numeric literals, and the presence of __typename fields must match between the incoming freeform GraphQL document and the document in the persisted query list.
ⓘ NOTE
Prior to Router v1.28, safelisting required the incoming document to match the document in the safelist precisely, including white space, comments, and top-level definition order.
For example, most applications treat responses from the following queries equivalently, but the router would reject the client operation because it doesn't match the PQL entry exactly. (The operations do semantically differ because GraphQL servers return fields in the order requested, even though most applications ignore the order of object fields in JSON.)
query GetBooks {books {publishDatetitle}}
query GetBooks {books {titlepublishDate}}
Ordering differences (other than the order of top-level definitions) between a registered operation and the operation a client sends can similarly cause the router to reject client operations, even if they have no semantic impact on the operation.
query GetBooks($limit: Int, $offset: Int) {books(limit: $limit, offset: $offset) {title}}
query GetBooks($limit: Int, $offset: Int) {books(offset: $offset, limit: $limit) {title}}
ⓘ NOTE
The router ignores top-level definition order and ignored tokens to make it easier to build tools that generate persisted query manifests whose contents match what will be sent at runtime. If your use case requires further normalization steps to be applied when comparing incoming opportunities to the safelist, contact Apollo Support; we are open to adding further normalization as an opt-in feature.
To ensure that you generate manifest entries correctly, it's important to note that your app's client library may modify the operation strings you define in your source before executing those corresponding operations. For example, by default, all Apollo Client libraries add the __typename field to every object in a query if that field isn't already present:
query GetBooks {books {authortitle}}
query GetBooks {books {authortitle__typename}}
ⓘ NOTE
The manifest generation tools for Apollo Client libraries all account for this default behavior.
If you're building your own manifest generation tool, ensure it accounts for any such operation changes in your chosen client library. Otherwise, the router will reject your app's operations due to an operation string mismatch if safelisting is enabled.
Similarly, if your clients execute operations by providing their PQL-specified ID, they might execute an operation without the augmentation added by your client library if you don't account for these operation changes.